Sunday, July 26, 2020

ORACLE LINUX 5 INSTALLATION


ORACLE LINUX 5 INSTALLATION

Oracle Linux 5 Installation step by step
-----------------------------------------------------
 Oracle linux is an operating system it is compiled from RHEL source code ,Replacing Red Hat brand with Oracle .and is also used in oracle cloud, oracle engineered systems such as Oracle Exadata oracle linux uses so many companies in top industries like Software Companies,banking ,Hospital and health care ,and financial services

Version:    Oracle Linux Operating system 5.X  64 bit


chaitanyaoracledbablog
                             
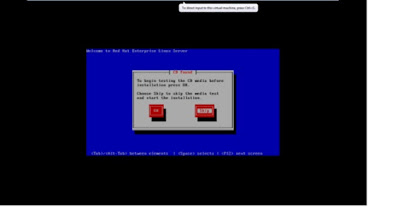
  Oracle linux window open to install or upgrade in graphical mode or install or upgrade in textmode 

                               Select  to install graphical mode press the key to enter


chaitanyaoracledbablog


                                       Choose skip and enter


chaitanyaoracledbablog


                                               Click on next

chaitanyaoracledbablog


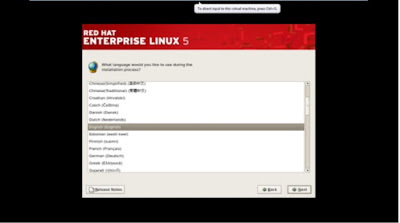
                                               Choose English language


chaitanyaoracledbablog


                                Choose key board language US English


chaitanyaoracledbablog

                    would you like to initialize this drive ,erasing all data
                     
                                         Click on ------>yes


chaitanyaoracledbablog


                                               Select Create Custom layout


chaitanyaoracledbablog


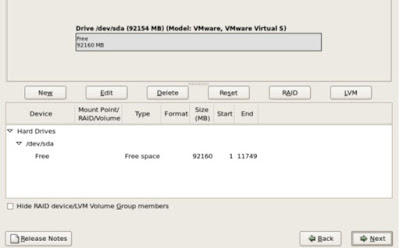
                       Click on sda select drive to use the installation and click on next


chaitanyaoracledbablog


                                       Click on select new  and select sda


chaitanyaoracledbablog


                                      Select Mount Point ---à     /
                                      Select file system --àext3-
                                       Click on-----> sda
                                        Size----à10000 mb (it may be differ from your environment)
                                       Click on ------->ok


chaitanyaoracledbablog


                                        File system type -à Swap
                                           Size-à 4000 mb
                                      Additional size-à select fixed size
                                          Click on----> ok


chaitanyaoracledbablog


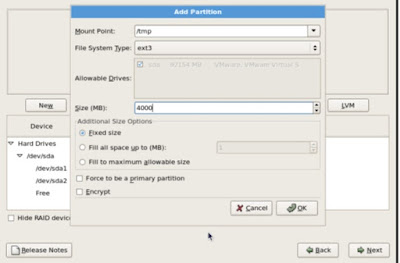
                                                 Mount point--à  /tmp
                                                File system ---à  select ext3
                                                 Size-à 4000 mb
                                        Additional size-à click on fixed size
                                                    Click on ok


chaitanyaoracledbablog


                         Select mount point ---à /oradata
                                 File system ----àext3
                                Click on select--> sda
                         Size--à enter the size 10000
                      Additional size-àfixed size
                              Click onà ok


chaitanyaoracledbablog


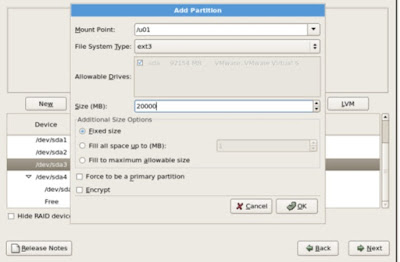
                                        mount point --à /u01
                                       File system ---àext3
                                              Size ---à20000
                                   Additional size-àFixed size
                                           Click onà ok


chaitanyaoracledbablog


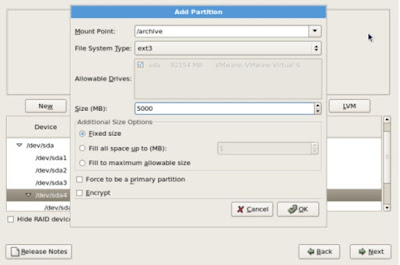
                                        Mount point--à/archive
                                            File system--àext3
                                            Size--à5000 mb
                                Additional size--àfixed size
                                           Click on -àok


chaitanyaoracledbablog


                               Mount Point-à/orabakcup
                                File system---àext3
                                    Size--à10000mb
                       Additional size-àclick on fixed size
                                   Click on --àok


chaitanyaoracledbablog


                                   Mount point --à /softwares
                                         File system--à/ext3
                                     Size ---à10000mb
                         Additional size options--àfixed size
                                   Click on --àok


chaitanyaoracledbablog


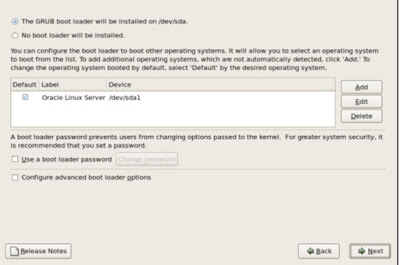
                              The grub boot loader will be installed on dev/sda
                               Click on -à Oracle Linux Server dev/sda1
                                         Click on -ànext


chaitanyaoracledbablog


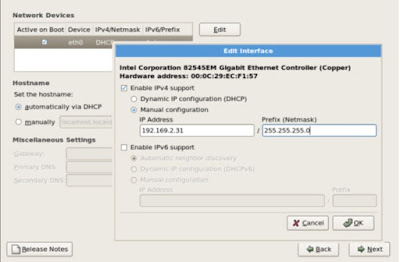
                                     Select --àNetwork Devices
                                   Disable  ---à IPv6
                                   Enable----à IPv4
                                  Manual Configuration    
                                  192.169.2.31
                                             Net mask - 255.255.255.0


                      Manual--à              OL5.chaitanyahost.com


chaitanyaoracledbablog


chaitanyaoracledbablog


                               Asia / Kolkatta


chaitanyaoracledbablog


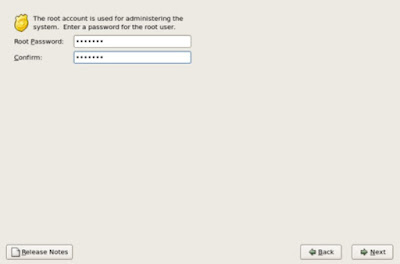
                                       User : root (administrator user)
                                    Paswd : root123 (enter the password)


chaitanyaoracledbablog


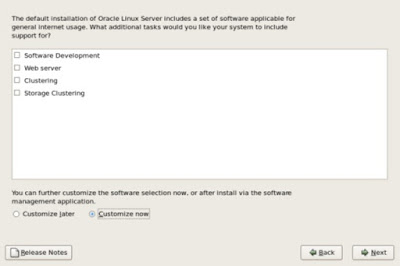
Choose customize now (option)
              
               Applications àEngineering and Scientific
               Development - ->Except KDE and ruby (select all)-
               Ruby Language –àNo changes
               Servers - Server àConfiguration Tools
               Base System - àSystem Tools


chaitanyaoracledbablog


Applications à Engineering & Scientific


è Except KDE and RUBY – SELECT ALL


chaitanyaoracledbablog


è Development --à Except KDE and Ruby


chaitanyaoracledbablog


è Servers ----àServer Configuration Tools


chaitanyaoracledbablog


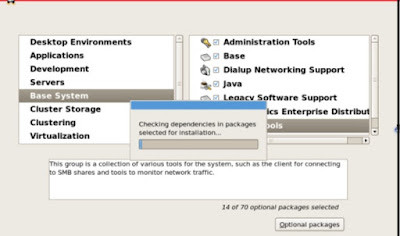
Base system -----> system Tools


chaitanyaoracledbablog

  It will check all the dependencies in package and selected for the installation


chaitanyaoracledbablog


        Click on next to install the oracle linux


chaitanyaoracledbablog


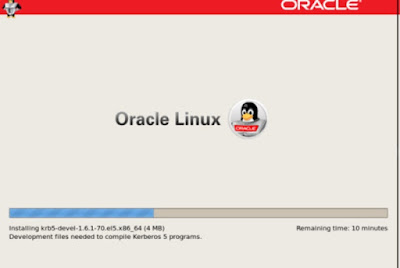
Installing the files


chaitanyaoracledbablog


Reboot the system


chaitanyaoracledbablog


It will show the welcome screen the set up agent will guide the installation process some basic configuration


chaitanyaoracledbablog


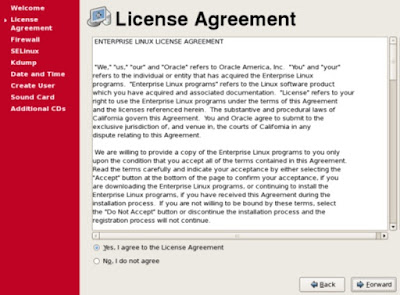
Click on accept the Licence agreement


chaitanyaoracledbablog


chaitanyaoracledbablog


Click on Firewall --à Disabled


chaitanyaoracledbablog


Click on SELinux  -----> Disabled


chaitanyaoracledbablog


Click on SELinux Setting -----> Disabled


chaitanyaoracledbablog


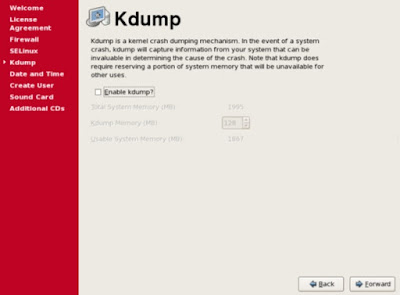
No Changes


chaitanyaoracledbablog


Click to Finish and Reboot the System


chaitanyaoracledbablog


Log in as Root User


chaitanyaoracledbablog


 Type Password ---> root 123


chaitanyaoracledbablog


Installation will be suceesfull completed it will open window and right click on open terminal and use


NOTE: Info on oracle linux 5 it may be differ from your environment like production,testing ,development,and ipaddress,hostnames,mountpoints,directory structure, etc


THANK YOU  VIEWING MY BLOG FOR MORE UPDATES 


ITIL Process

ITIL Process Introduction In this Blog i am going to explain  ITIL Process, ITIL stands for Information Technology Infrastructure Library ...