
Tuesday, September 1, 2020

Monday, August 31, 2020
Oracle Database 19c Features
Oracle Database 19c Features
Introduction
Oracle Database 19c is the long term release of the Oracle Database 12c and 18c family of products,it is available on all platformsWindows,Linux,Solaris,HP/UX and AIX as well as the Oracle cloud. Oracle Database 19c offers customers the best performance,scalibility,reliability, and security for all their operational and analytical workloads
Installation
Rpm based Installation install oracle 19c datbase using RPM method
Simlified image based installation of client as well
Upgrades
Auto Upgrade Utility for oracle Database
Docker Container for oracle 19c
Dryrun mode for Gridsetup in clusterware installation
General
Clear Flashback logs from time to time
Passwords removed from user accounts (default accounts)
Flush Metadata Cache for passwords
Multi-model partitioning with hybrid partioning allowing some partitions in database and some as external partitions even in HDFS
New ALTER SYSTEM statement clause FLUSH PASSWORDFILE_METADATA_CACHE
Hybrid Partitioned tables - to integerate internal partitions and external partitions into a single partition table. partitions to reside in both oracle database segments and in external files and sources
Schema-only accounts -Passwords Removed from oracle database accounts
Database Performance
SQL Quarantine - using Oracle's Resource manager tool is a great way to make sure SQL statements dont become resource hogs and slow down database performance everyone,if a system asks for more system resorces than the DBA allows ,Resources manager kills it,However in existing versions of oracle database,nothing stops users from executing problematic SQL statements again. In oracle 19C ,Resource manager can automatically quarantine the statements, user try to issue once again it wont be run at all
Automatic Indexing
This new feature puts oarcale automation capabilities to work.if oracle 19c thinks a database table would be benifit from an index,the system will automatically create the index and initially mark it as invisible so it cant be used .oracle 19c will then run SQL statements from your application to see if the index improves query execution you can control this feature with DBMS_AUTO_INDEX< a new PL?SQL package that's included in 19c
SQL Statement Diagnosability
SQL Statement Diagnosability with SQL Advisor repair and SQL Test case for procedures
Automatic Database Diagnostic Monitor(ADDM)
ADDM supports for pluggable Database (PDB'S)
Realtime Statastics For DML Operations
Oracle database 19c intoduces real time statastics which extend online support to conventional DML statements
Automatic Flashback of Standby Database
in prior versions DBA's wanted touse oracle flashback features to return aprimary database to previous state,In oracle 19c ,a DBA can put the standby database in MOUNT mode with no managed recovery and then flashback the primary one ,the standby will aslo be reverted,thus keeping it in sync with the primary Statistics Collection on custom frequency automatically From 19c database onwards ,High frequency automatic optimizer statastics collection complements the standard statasticscollection job
DataPump
Oracle data pump test mode for transportable tablespace(TTS)
Oracle data pump allows tablespace to stay read -only during TTS import
Oracle data pump import supports more object store credentials
Oracle data pump ability to exclude ENCRYPTION clause on import-new transform parameter OMIT_ENCRYPTION_CLAUSE
Oracle data pump support for resource usage limitations_new parameter MAX_DATAPUMP_PARALLEL_PER_JOB
Oracle data pump prevents inadvertent use of protected roles-new ENABLE_SECURE_ROLES parameter is available
Oracle data pump loads partitioned table data one operation-GROUP_PARTITION_TABLE_DATA, new value for the import DATA_OPTIONS Command line paramaeter
Pluggable Databases
Create Duplicate of an oracle database create duplicatedb command , in DBCA silent mode
Ability to relocate a PDB to another CDB using DBCA in silent mode
Create a PDB by cloning a remote PDB using DBCA in silent mode
ADDM Analysis at PDB level
Data Guard
Replicate Restore points from primary to standby
Dynamically change fast-start- failover (FSFO) target standby database to another standby database in the target list without disabling FSFO
Re-creation of broker configuration
Propagate restore points from primary to standby site
DML redirect to standby/ADG for read mostly applications
Simplified Dataguard broker parameter configurations
Observe only mode for data guard broker fast-satrt failover (FSFO)
Oracle dataguard multi-instance redo apply works with the in-memory column store
Finer granularity supplemental logging for logical standby databases
New Initialization Parameters in Oracle Database 19c
"-optimizer_gather_stats_on_conventional_dml" and " _optimizer_use_stats_on_conventional_dml" which are true by default
-optimer_stats_on_conventional_dml_sample_rate(at 100%)
DATA_GUARD_MAX_IO_TIME
DATA_GUARD_MAX_LONGIO_TIME
MAX_DATAPUMP_JOBS_PER_PDB
THANKS FOR VIEWING MY BLOG FOR MORE UPDATES FOLLOW ME OR SUBSCRIBE ME
Flashback technology Recover a Dropped User in Oracle
Flashback technology Recover a dropped user in oracle
Introduction
Using Flashback Technology we can restore the dropped user in oracle we will flashback the database to past when the user is available at the time of dropped before,
Then take the export dump of the schema and restore the database to same current state once database is up we can import the dump file
Prerequisites
1. Database must be Archivelog mode
2.Flash back must be enable for the database
3.All the flashback log and Archive log should be available from the time the user is dropped
Let us start the process
1.Make sure flashback and archive mode is enable.
SQL> select flashback_on,log_mode from v$database;
FLASHBACK_ON LOG_MODE
------------------ -------------------------------
YES ARCHIVELOG
2. lets drop the user and test the scenarios
04:47:15 SQL> select table_name from Chaitu_table where owner='CHAITANYA';
TABLE_NAME
----------------------------------------------------------------------------
ACCTTABLE1
MASTERTABLE2
04:47:33 SQL> drop user CHAITANYA cascade;
User dropped.
3.Flashback the database past when the user was available at that time
04:52:15 SQL> shutdown immediate;
Database closed.
Database dismounted.
ORACLE instance shut down.
04:52:50 SQL> startup mount;
ORACLE instance started.
Total System Global Area 1.1107E+10 bytes
Fixed Size 7644464 bytes
Variable Size 9294584528 bytes
Database Buffers 1711276032 bytes
Redo Buffers 93011968 bytes
Database mounted.
04:53:08 SQL> flashback database to timestamp to_date('20-AUG-2020 04:47:33','DD-MON-YYYY HH24:MI:SS');
Flashback complete.
4. Open the database in readonly mode
04:55:13 SQL> ALTER DATABASE OPEN READ ONLY;
Database altered.
04:55:31 SQL> select table_name from chaitu_tables where owner='CHAITANYA';
TABLE_NAME
--------------------------------------------------------------
ACCTTABLE1
MASTERTABLE2
we can see the tables are available now
5. Take export backup of the schema CHAITANYA
# exp owner=CHAITANYA file=chaitanya.dmp
Export: Release 12.1.0.2.0 - Production on Tue Aug 20 05:17:45 2020
Copyright (c) 1982, 2014, Oracle and/or its affiliates. All rights reserved.
Username: / as sysdba
Connected to: Oracle Database 12c Enterprise Edition Release 12.1.0.2.0 - 64bit Production
With the Partitioning, OLAP, Advanced Analytics, Real Application Testing
and Unified Auditing options
Export done in US7ASCII character set and AL16UTF16 NCHAR character set
server uses AL32UTF8 character set (possible charset conversion)
About to export specified users ...
. exporting pre-schema procedural objects and actions
. exporting foreign function library names for user CHAITANYA
. exporting PUBLIC type synonyms
. exporting private type synonyms
. exporting object type definitions for user CHAITANYA
About to export CHAITANYA's objects ...
. exporting database links
. exporting sequence numbers
. exporting cluster definitions
. about to export CHAITANYA's tables via Conventional Path ...
. . exporting table ACCTTABLE1 75341 rows exported
EXP-00091: Exporting questionable statistics.
. . exporting table MASTERTABLE2 44 rows exported
EXP-00091: Exporting questionable statistics.
. exporting synonyms
. exporting views
. exporting stored procedures
. exporting operators
. exporting referential integrity constraints
. exporting triggers
. exporting indextypes
. exporting bitmap, functional and extensible indexes
. exporting posttables actions
. exporting materialized views
. exporting snapshot logs
. exporting job queues
. exporting refresh groups and children
. exporting dimensions
. exporting post-schema procedural objects and actions
. exporting statistics
Export terminated successfully with warnings.
6. Now restore the database to current state
SQL> shutdown immediate;
Database closed.
Database dismounted.
ORACLE instance shut down.
SQL> startup mount
ORACLE instance started.
Total System Global Area 1.1107E+10 bytes
Fixed Size 7644464 bytes
Variable Size 9294584528 bytes
Database Buffers 1711276032 bytes
Redo Buffers 93011968 bytes
Database mounted.
SQL> recover database;
Media recovery complete.
SQL> alter database open;
Database altered.
7. create the empty user and import the dumpfile
SQL> create user chaitanya identified by chaitanya;
User created.
SQL> grant connect,resource to chaitanya;
Grant succeeded.
# imp file=chaitanya.dmp fromuser=CHAITANYA TOUSER=CHAITANYA
Import: Release 12.1.0.2.0 - Production on Tue Aug 20 05:23:59 2020
Copyright (c) 1982, 2014, Oracle and/or its affiliates. All rights reserved.
Username: / as sysdba
Connected to: Oracle Database 12c Enterprise Edition Release 12.1.0.2.0 - 64bit Production
With the Partitioning, OLAP, Advanced Analytics, Real Application Testing
and Unified Auditing options
Export file created by EXPORT:V12.01.00 via conventional path
import done in US7ASCII character set and AL16UTF16 NCHAR character set
import server uses AL32UTF8 character set (possible charset conversion)
. importing DBACLASS's objects into DBACLASS
. . importing table " ACCTTABLE1 " 75341 rows imported
. . importing table "MASTERTABLE2" 44 rows imported
we can restore the schema user chaitanya by using flashback technology
Note : Info on Flashback technology it may be differ in your environment like production,testing ,development and naming conventions
THANKS FOR VIEWING MY BLOG FOR MORE UPDATES FOLLOW ME OR SUBSCRIBE ME
Sunday, August 30, 2020
Recycle Bin in Oracle Database
Recycle Bin in Oracle Database
Introduction
In windows have a recycle bin to all deleted files will be store like wise in oracle database also
provided recycle bin which keeps all the dropped objects.
When we drop a table (DROP TABLE TABLE_NAME) in the database , The tables will logically be
removed but it still exists in the same tablespace
but with a prefix BIN$$ .And it will not release the space also
Note : The Recycle bin which will not work sys owned objects it will worked on user objects only
If we drop a table using purge command, tables willbe removed completely (even from recycle bin also)
How to check the recycle bin is on or off
1.SQL> show parameter recyclebin;
NAME TYPE VALUE
------------------------------------ ----------- ------------------------------
recyclebin string on
SQL> select name,value from v$parameter where name like '%recyclebin%';
NAME VALUE
------------ ------------
recyclebin on
2.Drop a table and check the table is there in the recycle bin or not
SQL> drop table chaitanya.CHAITUTABLE;
Table purged.
SQL> select owner,OBJECT_NAME,ORIGINAL_NAME,DROPTIME,CAN_UNDROP from dba_recyclebin where ORIGINAL_NAME='CHAITUTABLE';
OWNER OBJECT_NAME ORIGINAL_NAME DROPTIME CAN
------------------ --------------------------------------------- ------------------ ------------------- ---
CHAITANYA BIN$fxhnqWVcPLTgVAAQ4B8y7Q==$0 CHAITUTABLE 2020-01-10:12:45:03 YES
Now the table is in recycle bin we can recover the table if required
3. For purging the table for recyclebin
in order to remove the table from recyclebin also
SQL> purge table chaitanya.CHAITUTABLE;
Table purged.
SQL> select owner,OBJECT_NAME,ORIGINAL_NAME,DROPTIME,CAN_UNDROP from dba_recyclebin where ORIGINAL_NAME='CHAITUTABLE';
no rows selected
4. To purge complete recyclebin
SQL> select count(*) from dba_recyclebin;
COUNT(*)
----------
102
SQL> purge recyclebin;
Recyclebin purged.
SQL> select count(*) from dba_recyclebin;
COUNT(*)
----------
0
5. To drop a table without keeping in recyclebin
SQL> select count(*) from CHAITANYA.chaitusample;
COUNT(*)
----------
82269
SQL> drop table CHAITANYA.CHAITUSAMPLE purge;
Table dropped.
SQL> select owner,OBJECT_NAME,ORIGINAL_NAME,DROPTIME,CAN_UNDROP from dba_recyclebin where ORIGINAL_NAME='CHAITUSAMPLE';
no rows selected
Note : Info on Recycle bin in oracle it may be differ in your encironment like production, testing,development and naming conventions
THANKS FOR VIEWING MY BLOG FOR MORE UPDATES FOLLOW ME OR SUBSCRIBE ME
Saturday, August 29, 2020
Hot and Cold Backup in Oracle
Hot and Cold Backup in Oracle
Introduction
In Oracle basically we use either offline or Online backups, Offline backup is called as COLD backup and online backup is called HOT backup
Backups are two types---> Physical ------>Files(Control file,Data Files,Redolog files)
|---->Logical--------->Data
These Data/Files need to protect from any disaster for that we need to manage backups
Physical Backup: physical backups will have interms of Files using Hot and Cold backup we can take backups
Cold Backup:
Cold backup is a physical backup in which all the files of a database are copied without any change means it avoids the risk of copying data and hence the image copy is
can be easily moved to another system having the same operating system,it is the safest way of take back up of All data in the database that is controlfile(.ctl files),Datafiles(.dbf files)
and Redolog files(.logfiles) Cold back are not recommended to take backup for larger databases it will take more time and space consumption client will not accept down time
Process
While taking cold backup
Shutdown the instances
Complete full consistent backup
Traditional backup
Steps
1. Shutdown instances
2.Copy the Physical files using unix cp command
Note: /orabackup/prod/cold
$ mkdir -p /orabackup/prod/cold
shutdown immediate
Taking db files backup
$ cp /oradata/prod/*.dbf /orabackup/prod/cold
or
$ cp /oradata/prod
$cp * /orabackup/prod/cold
Taking Control files backup
$ cp /oradata/prod/*.ctl /orabackup/prod/cold
or
$ cp /oradata/prod
$cp * /orabackup/prod/cold
Taking redolog files backup
$ cp /oradata/prod/*.log /orabackup/prod/cold
or
$ cp /oradata/prod
$cp * /orabackup/prod/cold
Hot Backup
Hot backup is also physcial backup including the risk of copying data because during the hot backup the database is totally open and available for users that is online.when a full backup of database is required for the hotbackup
database must be running in the ARCHIVELOG mode,
Is a inconsistent backup
is incomplete backup
is a traditional backup
while hot backup ,database must be up and running also database be in archivelog mode,while in hot backup mode ,The database must be freezed can read but cannot write into datafiles so the changes are written into archivelog files tills ends,once the backup ended ,the changes are recovered into datafiles from archivelog
Process
1.archivelog mode
2.begin backup mode
3.copy the files
4.end backup
1. SQL> archive log list
2. SQL> select files #,status from v$backup;
3. SQL> alter database begin backup;
4. $ cp /oradata/prod/*.dbf /orabackup/prod/hot
5.SQL> alter database end backup
6 . SQL> alter database backup controlfile to '/orabackup/prod/hot/control01.bkp' ;
Note : Info on hot and cold backup it may be differ in your environment like production,testing,development and directory structures and naming conventions
THANKS FOR VIEWING MY BLOG FOR MORE UPDATES FOLLOW ME OR SUBSCRIBE ME
Friday, August 28, 2020
Thursday, August 27, 2020
Oracle Network Configuration Files
Oracle Network Configuration Files
Introduction:
To communicate with other systems (server machines to client machines or client machines to server machines) we need three network configuration files in order to communicate with the systems in oracle three files need to configure that is listener.ora,tnsnames.ora,sqlnet.ora,oracle net enables a network connection between a client and database server oracle net is a software component that resides on both the client and the database server.oracle net is layered on top of a network protocol -rules that determine how applications access the network and how data is subdivided into packets for transmission across the network .

The example files below are relevant for an Oracle installation and instance with the following values.
• HOST : chaitanyaoracledba.blogspot.com
• ORACLE_HOME : /u01/app/oracle/product/12.1.0.2/db
• ORACLE_SID : orcl
• Service : orcl
• DOMAIN : blogspot.com
listener.ora
The "listerner.ora" file contains server side network configuration parameters. It can be found in the "$ORACLE_HOME/network/admin" directory on the server. Here is an example of a basic "listener.ora" file from Linux. We can see the listener has the default name of "LISTENER" and is listening for TCP connections on port 1521. Notice the reference to the hostname "chaitanyaoracledba.blogspot.com". If this is incorrect, the listener will not function correctly.
LISTENER =
(DESCRIPTION_LIST =
(DESCRIPTION =
(ADDRESS = (PROTOCOL = TCP)(HOST = chaitanyaoracledba.blogspot.com)(PORT = 1521))
)
)
After the "listener.ora" file is amended the listener should be restarted or reloaded to allow the new configuration to take effect.
$ # Restart
$ lsnrctl stop
$ lsnrctl start
$ # Or Reload.
$ lsnrctl reload
The listener defined above doesn't have any services defined. These are created when database instances auto-register with it. In some cases you may want to manually configure services, so they are still visible even when the database instance is down. If this is the case, you may use a "listener.ora" file like the following.
LISTENER =
(DESCRIPTION_LIST =
(DESCRIPTION =
(ADDRESS = (PROTOCOL = TCP)(HOST = chaitanyaoracledba.blogspot.com)(PORT = 1521))
)
)
SID_LIST_LISTENER =
(SID_LIST =
(SID_DESC =
(GLOBAL_DBNAME = orcl.blogspot.com)
(ORACLE_HOME = /u01/app/oracle/product/12.1.0.2/db)
(SID_NAME = orcl)
)
)
If there are multiple database instances on the server, you can added multiple SID_DESC entries inside the SID_LIST section.
tnsnames.ora
The "tnsnames.ora" file contains client side network configuration parameters. It can be found in the "$ORACLE_HOME/network/admin" directory on the client. This file will also be present on the server if client style connections are used on the server itself. Here is an example of a "tnsnames.ora" file.
LISTENER = (ADDRESS = (PROTOCOL = TCP)(HOST = chaitanyaoracledba.blogspot.com)(PORT = 1521))
orcl.blogspot.com =
(DESCRIPTION =
(ADDRESS_LIST =
(ADDRESS = (PROTOCOL = TCP)(HOST = chaitanyaoracledba.blogspot.com)(PORT = 1521))
)
(CONNECT_DATA =
(SERVICE_NAME = orcl)
)
)
The alias used at the start of the entry can be whatever you want. It doesn't have to match the name of the instance or service. Notice the PROTOCOL, HOST and PORT match that of the listener. The SERVICE_NAME can be any valid service presented by the listener. You can check the available services by issuing the lsnrctl status or lsnrctl service commands on the database server. Typically there is at least one service matching the ORACLE_SID of the instance, but you can create more.
sqlnet.ora
The "sqlnet.ora" file contains client side network configuration parameters. It can be found in the "$ORACLE_HOME/network/admin" directory on the client. This file will also be present on the server if client style connections are used on the server itself, or if some additional server connection configuration is required. Here is an example of an "sqlnet.ora" file.
NAMES.DIRECTORY_PATH= (TNSNAMES, ONAMES, HOSTNAME)
NAMES.DEFAULT_DOMAIN = blogspot.com
# The following entry is necessary on Windows if OS authentication is required.
SQLNET.AUTHENTICATION_SERVICES= (NTS)
There are lots of parameters that can be added to control tracing, encryption, wallet locations etc. These are out of the scope of this article.
Testing
Once the files are present in the correct location and amended as necessary the configuration can be tested using SQL*Plus by attempting to connect to the database using the appropriate username (SCOTT), password (TIGER) and service (orcl.blogspot.com).
$ sqlplus scott/tiger@orcl.blogspot.com
Common Problems
The OS hostname command must return the correct hostname of your database server. If not, fix it so it does.
$ hostname
chaitanyaoracledba.blogspot.com
$
The server must have a correct entry in the "/etc/hosts" file matching the hostname and IP address of the server, as well as the loopback entry for localhost. For example in this case the values are as follows.
127.0.0.1 localhost localhost.localdomain localhost4 localhost4.localdomain4
192.168.0.100 chaitanyaoracledba.blogspot.com chaitanyaoracledba
If these are provided by DNS, that is fine also.
If you are using the ORACLE_HOSTNAME environment variable, possibly set in your "/home/oracle/.bash_profile", it must be set to the correct value.
export ORACLE_HOSTNAME=chaitanyaoracledba.blogspot.com
The HOST entry in the "listener.ora" file must point to an active network adapter, either real or loopback. If not, the listener will fail to start.
If the HOST entry in the "listener.ora" file is set to "localhost", the listener will start and accept connections from the local server, but not from other clients. You would typically expect this to be set to the hostname of the database server, although some people use the IP address instead.
For the client to make a connection via the listener, there must be a clear route through the network between the two machines. If you are struggling to connect, check network firewalls and the local firewall (iptables, firewalld, Windows Firewall) on the database server.
Tools for Network configuration
Oracle enables you to manage your network configuration with the following tools
Oracle Net Configuration Assistant
Enterprise manager
Oracle Net Manager
Oracle Net Configuration Assistant: The oracle universal installer launches Oracle Net Configuration Assistant after the database is installed use oracle net configuration assistant to configure the listening protocol address and service information for an oracle database,during a typical database install,oracle net configuration assistant automatically configures a listener called LISTENER that has TCP/IP listening protocol address for the database.Oracle Net Configuration assistant prompts you to configure a listener name and protocol address of your choice.
use Oracle Network Configuration Assistant for initial network configuration after database installation there after you can use the Oracle Enterprise Manager and Oracle Net Manager to configure and administer your network
Oracle Net Manager:
You can access Oracle Net Manager from the command line or for windows platforms through the start menu
command line (Unix,Linux or windows )run netmgr
on windows click the start button and select programs,oracle-oracle_home,configuration and migration tools, and then Net Manager
THANKS FOR VIEWING MY BLOG FOR MORE UPDATES FOLLOW ME OR SUBSCRIBE ME
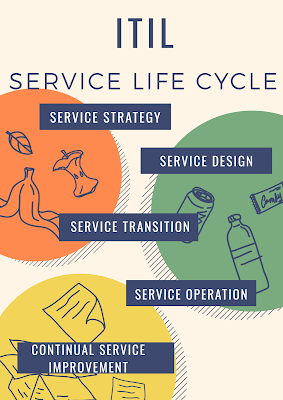
ITIL Process
ITIL Process Introduction In this Blog i am going to explain ITIL Process, ITIL stands for Information Technology Infrastructure Library ...
-
Oracle RAC Patching There are total three methods by which we can apply patch to RAC Cluster Environment on Unix System: Patching RAC as a ...
-
 RELATIONAL DATABASE MANAGEMENT SYSTEM SQL (short for structured query language) is an industry-standard language specifically design...
 -
Oracle RAC Services Introduction: In RAC (Real Application Cluster)environment a single service can represent an application,multiple ap...