Tuesday, August 4, 2020

ORACLE GOLDEN GATE 12 C


ORACLE GOLDEN GATE 12 C
------------------------------------------

Introduction :
---------------

Oracle GoldenGate is a software produces that allows you to replicate,filter and transform the data from one database to another database. it enables the replication of data between oracle databases and other supported heterogenous databases,Goldengate is designed for real time,change data capture routing and delivery it performs basic,row level transformationsOracle goldengate 12c enables the continuos,realtime capture,routing,transformation,and delivery of Transactional data across heterogenous environments,as new or updated data is commited at the source system,it is continuosly captured and applied to one or more target systems with low latency


Golden gate Architecture
-------------------------------

chaitanyaoracledba blog


Let us start the process
-------------------------

We have two environments one is prodb and another is devdb

This configuiration is to be done on both devdb and proddb

Before we install goldengate software we have to install the database 12c

Install 12c on GGPROD and create database us below option to install oracle 12c on GGPROD server

1. Installation option : install database software only

2.Single instance database installation

3.Enterprise Edition

4.Oracle Base :/u01/app/oracle

5.Software Location :/u01/app/oracle/product/12.1.0/db_home

6.Inventory Directory: /u01/app/orainventory 

7.orainventory Group Name :oinstall

8.Operating Systems groups :dba (set all to dba)

9.Proceed to install the database software


First we have to set the environment varibales ,start dbca and create proddb database 

Set below under bash_profile

export ORACLE_SID= proddb
export ORACLE_HOME=/u01/app/aoracle/product/12.1.0/db_home
export LD_LIBRARY_PATH=$ORACLE_HOME/lib
PATH=$PATH:=$ORACLE_HOME/bin

Open in vi editor bash_profile and save and quit

$exit
# su - oracle

env|grep ORA 

ORACLE_SID= proddb
ORACLE_HOME=/u01/app/aoracle/product/12.1.0/db_home

Next start using DBCA (Database configuration assistant)

1. Database Option: create database

2.Creation Mode :  Advanced Mode

3.Database Template: General purpose

4.Database  SID: proddb (Container database -uncheck/disabled)

5.Manageemnt Options :All options unchecked

6.Database Creddintilas :provide sys user password

7.Listener Configuration :uncheck we will configure listener manually

8.Storage Locations 

   a. User common locations for all database files
   b. Enable FRA with 20 gb size
   c. Enable archiving

9.Database Option :check sample schema     (here we will select in proddb environment but devdb do not check sample schema we will replication sample schema from proddb to devdb using golden gate )

10.Create Database

Install Oracle 12c Golden Gate on both the servers(devdb,and proddb)
------------------------------------------------------------------------------------

Oracle golden gate software ---->12.2.0.1

Copy the Golden gate installation Zip files on both the servers  under this directory /u02


Install Golden gate Software on GGPROD

Unzip the golden gate zip files

$ cd /u02
$ unzip fbo_ggs_Linux_x64_shipome.zip


Start installing Golden gate on GGPROD server

$ cd fbo_ggs_Linux_x64_shipome/Disk1

./runInstaller

oracle goldengate installation wizard will be started

select installation Option 

select the oracle Goldengate for oracle database 12c

After that Golden gate installation on both the servers

we have to start the replication process before we have to do 

Single table Initial Load and change sync

Database---> Proddb--->    schema---> Fox------>Table--->EMP 

Database----> Devdb---->   Schema----> Tom------>Table--->EMP


Let us create EMP table from SCOTT.EMP for fox user

proddb

sqlplus '/as sysdba'

sql>create table fox.emp as select * from scott.emp;

sql>alter table fox.emp add primary key ("EMPNO");

on the target database just create the EMP table with out any data into it generate the FOX.EMP table ddl command


proddb
sql> set heading off;
sql>set echo off;
sql>set pages 999;
set long 90000;
sql>select dbms_metadata.get_ddl('TABLE",'EMP','FOX') fro dual; (in the above output FOX TO TOM and execute this command GGDEV

Let us start the process
----------------------------

1.Create empty table(with out any data) on target database

2.set up goldengate initial load


3.Configure change sync(inserts,updates,deletes)

4.Delete initial load(EXT/REP)


Step 1 : Configure change sync for fox.emp table

connect to database via Goldengate


proddb

cd $ GG_HOME
./ggsci

ggsci>dblogin userid ogg .password ogg

suceesfully logged into database

> info all

>start mgr

add table level supplemental logging via Goldengate


ggprod

ggsci>add trandata FOX.EMP

logging of supplemental redo data enabled for table FOX.EMP
TRANDATA for scheduling columns has been added on table 'FOX.EMP'

GGPROD

GGSCI>ADD EXTRACT PFOXE1, INTEGRATED TRANLOG,BEGIN NOW EXTRACT(Integrated added) 

GGSCI>register extract PFOXE1 database


Create Local trail file for extract process

GGSCI> add exttrail /u01/app/oracle/product/gg/dirdat/pf,extract PFOXE1

Create parameter file for extract process

GGSCI> edit param PFOXE1

EXTRACT PFOXE1
USERID ogg,password OGG
EXTTRAIL /uo1/app/oracle/product/gg/dirdat/pf
TABLE FOX>EMP;

Create GG DP process   (here DP means datapump)

GGSCI> add extract PFOXD1,EXTTRAILSOURCE /u01/app/oracle/product/gg/dirdat/pf

Create Remote trail file for extract process

GGSCI>add rmttrail/u01/app/oracle/product/gg/dirdat/rf, extract PFOXD1

Create parameter file for data pump process

GGSCI> edit param  PFOXD1

EXTRACT PFOXD!
USERID ogg ,PASSWORD ogg
RMTHOST ggdev, MGRPORT 7809
RMTTRAIL /u01/app/oracle/product/gg/dirdat/rf
TABLE FOX.EMP;

Create CG REplicate on target

GGDEV

GGSCI>dblogin userid ogg,password ogg
GGSCI>add replicat DFOXR1, integrated exttrail /u01/app/oracle/product/gg/dirdat/rf

Create parameter file for replicat on target

GGSCI> edit param DFOXR1

REPLICAT DFOXR1
USERID ogg,PASSWORD ogg
ASSUMETARGETTDEFS
MAP FOX.EMP TARGET TOM.EMP;

Step 2:

Configure initial load extract and replicat
-------------------------------------------------

Add initial load EXtract on source

proddb
------

GGSCI> ADD EXTRACT INITLE,SOURCEISTABLE

eidt parameter file for initial load extract

GGSCI> EDIT PARAM INITLE

EXTRACT INITLE
userid ogg, password ogg
RMTHOST ggdev,mgrport 7809
RMTTASK REPLICAT,GROUP INITLR
TABLE FOX.EMP;

Add initial load Replicat on target

devdb
-----

GGSCI> ADD REPLICAT INITLR,SPECIALRUN

edit parameter file for initial load replicat

GGSCI> EDIT PARAM INITLR

REPLICAT INITLR
userid ogg,password ogg
ASSUMETARGETTDEFS
MAP FOX>EMP,TARGET TOM.EMP;


Step-3
------

Start Initial Load and change sync

Fisrt start the change sync extract and datapump on source,This will start capturing changes while we perform the initial load.(Do not start replicat at this point)


proddb
------
GGSCI>start PFOXE1
GGSCI>start PFOXD1

Now start the initial load extract (Remember this will automatically start the initial loadreplicat on)

GGSCI> start INITLE
GGSCI> INFO INITLE


verify on taget if all the 14 recorrds have been loaded on target table or not

devdb
-----

sqlplus '/as sysdba
select * from tom.emp;

now start the change sync replicat

devdb
----

GGSCI> start DFOXR1

note :At this stage ,youcan delete the initial load extarct and replicat process as they are no longer needed

if you get below error while starting the initial load extarct

2020-08-04 12:23:40 ERROR OGG-01201 ERROR reported by MGR
2020-08-04 12:23:40 ERROR OGG-O1668 ERROR PROCESS ABENDING

add below line to ggdev mgr

ACCESSRULE,PROG* IPADDR*,ALLOW

GGSCI> refresh mgr


Note: info on Goldengate it may be differ from your environment like production,testing,development using naming conventions,directory structures 


THANK YOU FOR VIEWING MY BLOG FOR MORE UPDATES FOLLOW ME


Monday, August 3, 2020

LINUX USER GROUP MANAGEMENT


LINUX USER GROUP MANAGEMENT
-----------------------------------------------------


Linux users 
---------------

Three types of user accounts in Linux operating system they are

1)Root User:The Root User is called as Super User, A Super User can run any command with out any restrictions or privileges,This account is ability to carry out all facets of system administration
including adding accounts,changing user passwords,examining log files,installing software etc,when your are signed in as root the shell prompt displays '#' as the last character if your using terminal


2)System User: The system accounts are needed for the operation of system -specified components like mail accounts and sshd account ,also if we install oracle,it will create a user oracle,these kind of users are called as system user


3)Normal User: These users are created by root user .normal users accounts provide access to the system for users and groups of users ,these users have limited access to critical system files and directories 
  

Create Users
---------------

useradd chaitanya


Assign password to user
--------------------------------

passwd chaitanya

changing password for user chaitanya

new password:chai123
retype new password: chai123
passwd:all authentication tokens updated sucessfully


Create a user with account expiry date
--------------------------------------

useradd -e 2020-07-03 abhiram

passwd abhiram

changing password for user abhiram

new password:abhi123
retype new password:abhi123
passwd:all authentication tokens updated succesfully


user add options:

-u ---->user id
-g------>primary group id
-G------>secondary group id
-d------>home directory
-c------>comment -s shell
-s------>shell


create a user with specific userid
--------------------------------------
 useradd- u 504 manasa

craete a user with specific userid and group id
------------------------------------------------------
useradd -u 600 -g 504 saibabu


Add a user to multiple groups
------------------------------------

 we can add a user to multiple groups by specifying with group name or group id

useradd -G prod,test pavan
id pavan
uid=601(pavan) gid=601(pavan) groups=601(pavan),3460(prod)3461(test)

useradd -G 3460,3461 vasanth

id ward
uid=602(vasanth) gid=602(vasanth)groups=602(vasanth),3460(prod),3461(test)


Add a user with comments
------------------------
useradd -c"administrator" chaitanya

tail -1 /etc/passwd
chaitanya:x:603:603:administrator:/home/chaitanya:/bin/bash


Add user with home directory
----------------------------

useradd -d /home/mydir chaitanya

tail -1 /etc/passwd
chaitanya:x:604:604::/home/mydir:/bin/bash


Deleting a existing user
------------------------
userdel chaitanya


Delete user even if he is still logged in
----------------------------------------

userdel - f manasa


Delete user along with home directory
--------------------------------------------

userdel -r abhiram

Modify User Properties
-----------------------------

changing the home directory of user

grep chaitu /etc/passwd
chaitu:x:504:504::/home/jones:/bin/bash

usermod -d /home/chaithu chaitu

grep chaitu /etc/passwd
user8:x:604:604::/home/chaithu:/bin/bash


Changing the primary group of a user
---------------------------------------------
usermod -g  prod vasanth


Locing and unlocing users
-------------------------------- 
usermod -L abhiram

usermod -U abhiram

verify in /etc/shadow file it shows exclamation(!) mark at user name when  user locked, After unlock it will disappear
-----------------------------------------------------------------------------------------------------------------------
usermod -L abhiram

cat/etc/shadow |grep abhiram

abhiram:!$1$nAgOX9u$GLtQsaMcMBvlPUPgY.0:17143:0:99999:7:::

usermod -U abhiram

cat/etc/shadow |grep abhiram

abhiram:$1$nAgOX9u$GLtQsaMcMBvlPUPgY.0:17143:0:99999:7:::


Changing Login name and password
--------------------------------------------

usermod -l abhiram karthikeya
usermod -p P@ssWord abhiram


View account aging information
---------------------------------------
chage -l bobby

changing password parameters
-------------------------------------
chage bobby
changing the aging information for bobby
enter the new value,or press ENTER for the default


User Attributes
---------------------

User type:Super user
User Name: root
User ID: 0
Group ID:0
Home Directory:/root
Shell:/bin/bash


User type:System user
User Name:ftp,mail,apache etc
User ID: 1 to 499
Group ID:1 to 499
Home Directory:/var/ftp/,var/etc etc
Shell:/sbin/nologin


User type:Normal user
User Name: abhiram,vasanth
User ID: 500 to 600000
Group ID:500 to 600000
Home Directory:/home/username
Shell:/bin/bash

Important Files
-------------------

/etc/passwd : keeps user accounts and passwords information this file holds the majority of information about accounts on the linux system

/etc/shadow : holds the encrypted password of the corresponding user account


LINUX  GROUPS
-----------------------

Linux Groups are a mechanism to manage a collection of users ,all linux users have a user id (UID) and group id(GID),Groups can be assigned to the users together for 

a common security,privilege and access purpose.files and devices may be granted access based on user id or groupid

 
Important Files
-------------------

/etc/group : This file contains the group information for each account

/etc/shadow : This file contains secure group account inforamatiom


Options
----------

-M -----> add multiple users

-A------> add group administrator

-a------>add single user to group

-d------>removing user from group


Create Groups
------------------

create a new group
----------------------

groudadd group01

tail -1 /etc/group

group01:x:3461:

Creating a group force with success status
--------------------------------------------------

groupadd -f group02

tail -1 /etc/group

group02:x:3462


Creating group with custom GID
---------------------------------------

groupadd -g 5000 group03

tail -1 /etc/group

group03:x:5000:


Creating System Group
-----------------------------

groupadd -r sysgrp

tail -1 /etc/group
sysgrp:x:403:

Modify Groups
-------------------

changing name of the group

groupmod -n newgroup01 group01


Adding and removing user to a group
------------------------------------
gpasswd -M user8,user7 group03

tail /etc/group |grep group03
group03:x:5000:user8,user7

gpasswd -d user6 group03

tail /etc/group | grep group03
group03:x:5000:user8,user7


Delete a group
--------------------

groupdel newgroup01


Note : Info on linux user group management it may be differ from your environment production,testing,development etc


THANKS FOR VIEWING MY BLOG FOR MORE UPDATES FOLLOW ME  


Friday, July 31, 2020

RMAN COMMANDS IN ORACLE


RMAN COMMANDS IN ORACLE 
---------------------------------------------

rman target /
rman> show all
rman >backup database plus archivelog;
rman>shutdown immediate;
rman>startup force dba;
rman>shutdown immediate;
rman>startup mount;
rman>backup database;
rman>backup as copy database;
rman>alter database open;


RMAN> BACKUP DATABASE;
RMAN> BACKUP ARCHIVELOG ALL;
RMAN> BACKUP DATABASE PLUS ARCHIVELOG;

Note that the PLUS ARCHIVELOG clause performs the following:

Runs the ALTER SYSTEM ARCHIVE LOG CURRENT command
Runs the BACKUP ARCHIVELOG ALL command. If backup optimization is enabled only backs up logs that have not already been backed up.
Backs up files specified in the BACKUP command
Runs the ALTER SYSTEM ARCHIVE LOG CURRENT command
Backs up any remaining archived logs including those generated during the backup
A FORMAT can be specified for each subclause in the BACKUP DATABASE PLUS ARCHIVELOG command. For example:

RUN
{
  ALLOCATE CHANNEL chan01 TYPE DISK MAXPIECESIZE 10G;
  BACKUP
  FORMAT '/u03/app/oracle/PROD/%d_D_%T_%u_s%s_p%p'
  DATABASE
  PLUS ARCHIVELOG
  FORMAT '/u03/app/oracle/PROD/%d_A_%T_%u_s%s_p%p';
  RELEASE CHANNEL chan01;
}

Note that FORMAT clause precedes the DATABASE clause, but follows the PLUS ARCHIVELOG clause.

The BACKUP command can be extended to backup the current control file and the SPFILE.

For example:

RUN
{
  ALLOCATE CHANNEL chan01 TYPE DISK MAXPIECESIZE 10G;
  BACKUP
  FORMAT '/u03/app/oracle/PROD/%d_D_%T_%u_s%s_p%p'
  DATABASE
  CURRENT CONTROLFILE
  FORMAT '/u03/app/oracle/PROD/%d_C_%T_%u'
  SPFILE
  FORMAT '/u03/app/oracle/PROD/%d_S_%T_%u'
  PLUS ARCHIVELOG
  FORMAT '/u03/app/oracle/PROD/%d_A_%T_%u_s%s_p%p';
  RELEASE CHANNEL chan01;
}

RMAN> BACKUP CURRENT CONTROLFILE;

RMAN> BACKUP SPFILE;

RMAN> BACKUP DATAFILE '/u01/app/oradata/PROD/users01.dbf';

RMAN> BACKUP DATAFILE 4;

Controlfile backups
-------------------------
The current controlfile can be automatically backed up by the BACKUP command by configuring the CONTROLFILE AUTOBACKUP parameters

To backup the current controlfile explicitly use:

RMAN> BACKUP CURRENT CONTROLFILE;
SPFILE backups The SPFILE can be automatically backed up with the control file during database backups by configuring the CONTROLFILE AUTOBACKUP parameters

To backup up the SPFILE explicitly use:

RMAN> BACKUP SPFILE;
Datafile backups To backup a specific data file use BACKUP DATAFILE. For example:

RMAN> BACKUP DATAFILE '/u01/app/oradata/PROD/users01.dbf';
Altermatively specify the data file number. For example:

RMAN> BACKUP DATAFILE 4;
The data file number can be obtained from V$DATAFILE. For example:

SQL> SELECT file#, name FROM v$datafile;
Tablespace Backups
To backup a tablespace use the BACKUP TABLESPACE command. For example:

RMAN> BACKUP TABLESPACE USERS;
Compressed Backups
To compress the backup use:

RMAN> BACKUP AS COMPRESSED BACKUPSET DATABASE;
The resulting compressed backup is around 20%-30% of the size of the uncompressed equivalent.

Format clause
The format clause allows the backup files to be directed to a specific location.

For example:

BACKUP FORMAT '/u01/app/oracle/backup/%U' DATABASE;
The above statement created the following files in /u01/app/oracle/backup:

[oracle@vm3]$ ls -l /u01/app/oracle/backup
total 1161280
-rw-r----- 1 oracle oinstall 1178050560 Jul 31 06:31 15qeibgs_1_1
-rw-r----- 1 oracle oinstall    9928704 Jul 31 06:31 16qeibld_1_1

Other formats can be specified. For example:

BACKUP FORMAT '/backup2/PROD/PROD_df_%t_s%s_p%p' DATABASE;
In the above example %t is the backup set timestamp, %s is the backup set number and %p is the piece number within the backup set.

Tags:A backup tag can optionally be specified with the BACKUP command.

For example:

BACKUP DATABASE TAG = 'Full_Backup';
The tag is reported by the LIST command.

If a tag is not specified then a system-generated tag is assigned.

Incremental Backups
-------------------------------
By default backups are full (level 0). Backups can also be incremental (level 1).

Incremental backups can be:
-----------------------------------

Differential - includes all changes since the last full or incremental backup
Cumulative - includes all changes since the last full backup
Differential backups require less space. Cumulative backups are faster to restore

Differential backups are the default.

To run a diffential incremental backup use:

RMAN> BACKUP INCREMENTAL LEVEL 1 DATABASE;
To run a cumulative incremental backup use:

RMAN> BACKUP INCREMENTAL LEVEL 1 CUMULATIVE DATABASE;
Note that in order to take a level 1 backup, a level 0 backup must already exist.

A full backup using BACKUP DATABASE is not the same as a level 0 backup. - the LV column of the LIST BACKUP output is NULL after a full backup.

In order to take a level 0 backup use

RMAN> BACKUP INCREMENTAL LEVEL 0 DATABASE;
To create an image copy of an entire database use:

RMAN> BACKUP AS COPY DATABASE;
To create an image copy of a specific datafile use:

RMAN> BACKUP AS COPY DATAFILE <file#>
For example:

RMAN> BACKUP AS COPY DATAFILE 4 FORMAT '/u01/app/oracle/copy/users01.dbf';
Alternatively specify the source file name. For example:

RMAN> BACKUP AS COPY DATAFILE '/u01/app/oradata/PROD/users01.dbf'
FORMAT '/u01/app/oracle/copy/users01.dbf';
Recovery Area
To backup the recovery area use:

RMAN> BACKUP RECOVERY AREA TO DESTINATION '/u02/app/oracle';
Note that a destination must be specified if the recovery area is being backed up to disk.


Note : Info on Rman commands it may be differ in your environment like production,development,testing


THANK YOU FOR VIEWING MY BLOG FOR MORE UPDATES FOLLOW ME

OEM ORACLE MONITORING TOOL


 OEM ORACLE MONITORING TOOL
-------------------------------------------------


ORACLE ENTERPRISE MANAGER (OEM) ORACLE MONITORING TOOL
--------------------------------------------------------------------------------------------------

Introduction: 

 Oracle Enterprise Manager is a set of web based tools aims at managing software and hardware produced by oracle corporation as well as by non -oracle entitie  OEM is a system management tool which provides an integrated solution for managing your heterogenous environment,it combines a graphical console,agents,common services,and tools to  provide an integrated comprehensive systems management platform for managing oracle products.

           In traditional one  Oracle enterprsise manager in each databases one single enterprise manager in all the database,agent is the mediator for OEM and databases they will constantly monitor The database ,one single web URL which is used to login for entire monitoring environment all your targeted databases,they come with 12c cloud technology,12c OEM has a repository database will hold all the data for agent 


chaitanyaoracledba


1) Monitor other vendor databases also

2)Host monitoring

3)Generate all performance report from OEM itself like AWR at consolidate at one place

4)Schedule jobs

5)Monitoring Templates like any tablespace reach 90% thresh holdvalue set to 90% usage you will get the notify (Templates),you choose what the template you want apply to the target databases

6)Groups-->Target Groups :groups in 12c oem the entire group the entire job will be done in target groups like shutting down the database running queries

7) Monitor the RAC setup

8)Monitor the weblogic 

9)Monitor the fusionware

10)Monitor the other vendors

11)we can configure thresh holds critical medium in the oem itself

12)Mount point utilization 

13)we can take backup using the own scripts 

14)checking blocking session is easy in OEM (performance tuning)

15)all the reports can be generated in OEM like (AWR,ADDM,ASH)

16)Startup and shutdown also be done in OEM

17)OEM also checks the database growth

Let us Start the process
----------------------------

Prerequisites
--------------

Oracle Linux installed in the system

Database should be installed

we will install the Enterprise Manager on a linux platform

chaitanyaoracledba

chaitanyaoracledba


we will get the software from oracle website ---->Downloads---->Enterprsie Manager---->click on oracle enterprise manager downloads----> select on linux x86 64 bit


we can get the three zipped files like em12103_linux_disk1.zip,em12103_linux_disk2.zip,em12103_linux_disk2.zip

before starting  the install we need to make sure that there no database control configurataion 

chaitanyaoracledba


we need to set up that

we need to listener is to be started

after that emca -config dbcontrol db


chaitanyaoracledba


started em configuration assistant

chaitanyaoracledba


it will ask like  database sid-->prod

listener port number -->1521

Listener Oracle_Home /u01/app/oracle/product/12.1.0/db

Password for sysuser

Password for DBSNMP user 

Password for SYSMAN user

Email address for notifications

Outgoing mail SMTP server for notifications

You have to specified the following settings

After that emca configuration assistant completed it will get the  OEM url


chaitanyaoracledba


                                    login screen Menu screen


chaitanyaoracledba


chaitanyaoracledba


                                     Home Menu  screen 

chaitanyaoracledba

         
                                          Performance Menu screen


chaitanyaoracledba


                                              Availability Menu Screen 

chaitanyaoracledba


                                                       Server Menu Screen


chaitanyaoracledba

                                       Schema Menu Screen


chaitanyaoracledba


                                          Data movement Screen Menu


chaitanyaoracledba


                                          Software and Support Menu


Note : info on OEM it may be differ from your environment like production,testing,development 


THANK YOU FOR VIEWING MY BLOG FOR MORE UPDATES FOLLOW ME 


ORACLE DATABASE HEALTH CHECK SCRIPTS

 ORACLE DATABASE HEALTH CHECK SCRIPTS
-----------------------------------------------------------------


Check the Database Availability
--------------------------------

sqlplus '/as sysdba'

sql>startup

sql>select instance_name,status from v$instance;


check the database read or write mode
-----------------------------------------------

sql>select name,open_mode from v$database;


check the oracle process run or not
-----------------------------------
# ps -ef |grep pmon


Health check of database instance &Listener
------------------------------------------
open terminal in linux machine
# lsnrctl status<listener-name>
if not started
# lsnrctl start <listener-name>

Check Long running process unix process
---------------------------------------
#  ps -ef | grep java 


Check Monitor alert log file in oracle
--------------------------------------
Log will be created in directory below the value of diagnostic_dest_parameter
DIAGNOSTIC_DEST parameter DIAGNOSTIC_DEST/diag/rdbms/db_name/oracle_sid/trace
alert.logfile

trace file is created by the user process and it is written in  USER_DUMP_DEST
alert file is created by server process and it is written in BACKGROUND_DUMP_DEST

You can delete alertsid.log any time while database is running when any log entry occurs it will create automatically no need to startup or shutdown,
The alertlog file also reffered to as the alert.log is chronlogical log of messages and errors written in out by oracle database typically mesages found in the file is 
database startup,shutdown,log switches,space errors etc

Check Monitoring space availability
----------------------------------
my oracle work history

sql>select job_name,session_id,running_instance,elapsed_time,cpu_used from dba_scheduler_running_jobs

Check size of schema
--------------------
sql>select sum(bytes)/1024/1024/1024 as 'size in gb' from dba_segments where owner= 'UPPER';

Check Size of database
----------------------
sql>select round((sum(bytes)/1048576/1024),2) from v$ datafile;

Check Size of table in oracle
-----------------------------
sql>select sum(bytes) from user_segments where segments_type='TABLE';

Check to get size in mb
-------------------------
sql>select segment_name,segment_type,bytes/1024/1024 mb from dba_segments where segment= type='TABLE' and segment_name='emp';

Database, Datafile and Backup
------------------------------
sql>select name,open_mode,log_mode,database_role,force_logging,flashback_on from v$database;
sql>select * from v$recover_file;
sql>select distinct status,count() from v$datafile group by status;
sql>select name, RECOVER from v$datafile_header where RECOVER != 'NO';
sql>select name, ERROR from v$datafile_header where ERROR is NOT NULL;
sql>select name, ts# from v$datafile where upper(name) like '%MISSING%';
sql>select NAME, FILE# from v$datafile where status='RECOVER';
sql>select status,count() from v$backup group by status;


Check DBA Registry
--------------------
sql>set lines 150 pages 500
column COMP_NAME format a45
column version format a15
column status format a12
sql>select comp_name,version,status from dba_registry;


Check DBA Registry History
-----------------------
sql>set lines 150 pages 500
column action format a15
column namespace format a15
column comments format a20 wrap
column ACTION_TIME format a30
col BUNDLE_SERIES format a12
column version format a15
sql>select * from dba_registry_history;


Check Invalid Object
---------------------------

sql>col object_name format a50
col owner format a10
set lines 300
set pages 1000
sql>select object_name,object_type,owner,status from dba_objects where status = 'INVALID';


Queries to check Locks
-----------------------
sql>SELECT DECODE(request,0,'Holder: ','Waiter: ')||sid sess,
id1, id2, lmode, request, type FROM V$LOCK WHERE (id1, id2, type) IN (SELECT id1, id2, type FROM V$LOCK WHERE request>0) ORDER BY id1, request;


Check Library cache locks
--------------------------
sql>select  w1.sid waiting_session,h1.sid holding_session,
w.kgllktype lock_or_pin,
w.kgllkhdl address,
decode(h.kgllkmod, 0, 'None', 1, 'Null', 2, 'Share', 3, 'Exclusive',
'Unknown') mode_held,
decode(w.kgllkreq, 0, 'None', 1, 'Null', 2, 'Share', 3, 'Exclusive',
'Unknown') mode_requested
from dba_kgllock w, dba_kgllock h, v$session w1, v$session h1
where
(((h.kgllkmod != 0) and (h.kgllkmod != 1)
and ((h.kgllkreq = 0) or (h.kgllkreq = 1)))
and
(((w.kgllkmod = 0) or (w.kgllkmod= 1))
and ((w.kgllkreq != 0) and (w.kgllkreq != 1))))
and w.kgllktype = h.kgllktype
and w.kgllkhdl = h.kgllkhdl
and w.kgllkuse = w1.saddr
and h.kgllkuse = h1.saddr;


hcheck.sql – Script to Check for Known Problems in Oracle8i, Oracle9i, Oracle10g, Oracle 11g and Oracle 12c and Above
----------------------------------------------------------------------------------------------------------------------
A)$ sqlplus

sql> spool hcheck.log
sql> @hcheck
sql> spool off

For 12c with Multitenant, connect to each PDB to run the script. 
----------------------------------------------------------------

sql> show pdbs
CON_ID   CON_NAME     OPEN MODE      RESTRICTED
-------- ------------ -------------- -------------
2        PDB$SEED     READ ONLY      NO
3        CDB1_PDB1    READ WRITE     NO
4        CDB1_PDB2    READ WRITE     NO

sql> alter session set container=CDB1_PDB1;
Session altered.
sql> spool hcheck.log
sql> @hcheck
sql> spool off


Note: info on database health check it may be differ from your environment like production,testing ,development


THANKS YOU FOR VIEWING MY BLOG FOR MORE UPDATES FOLLOW ME OR SUBSCRIBE ME

Thursday, July 30, 2020

ADDM REPORT IN ORACLE FOR PERFORMANCE TUNING


ADDM REPORT IN ORACLE FOR PERFORMANCE TUNING
---------------------------------------------------------------------------------

Introduction
----------------

ADDM : Aotomatic Database Diagnostic Monitor is a self Diagnostic engine built in oracle database ,ADDM examines and analyze data captured in the AWR to determine possible performance problems

  In oracle database,ADDM uses database time statastics to identify performance problems,ADDM compares the difference between snapshots,by default AWR generates snapshots of performance data ,once every hour,alternatively you can modify the default values of both the interval between snapshots and their retention period,analyze your current database prformance when its hanging or  running slow using ADDM is a server based expert that reviews the database performance every 1 hr by default, its goal is to detect possible bottle necks early and recommended fixes before  system performance degrades noticably.


ADDM Analysis Include following
-------------------------------------------

Cpu load

Memory Usage

I/O Usage

Resources intensive sql

Rseources Intensive pl/sql ,java

RAC issues

Application Issues

Database configuration issues

Concurrency issues

Hardware Changes

Schema Changes

Application Changes

Using other advisors

Sql tuning advisor

Sql acecss advisor

Memory advisor----------> pga advisor----->buffer cache advisor,shared pool advisor,java pool advisor,streams pool advisor

Space advisor-----------> segmemt advisor,undo advisor

Backup -----------------> MTTR advisor


ADDM report can be generated from sql* plus using addmrpt.sql

$ ORACLE_HOME/rdbms/admin/

$ ls -ltr

$ ls -ltr | grep addmrpt*

$ sqlplus '/as sysdba'

connected to database


chaitanyaoracledba


sql>@?/rdbms/admin/addmrpt.sql

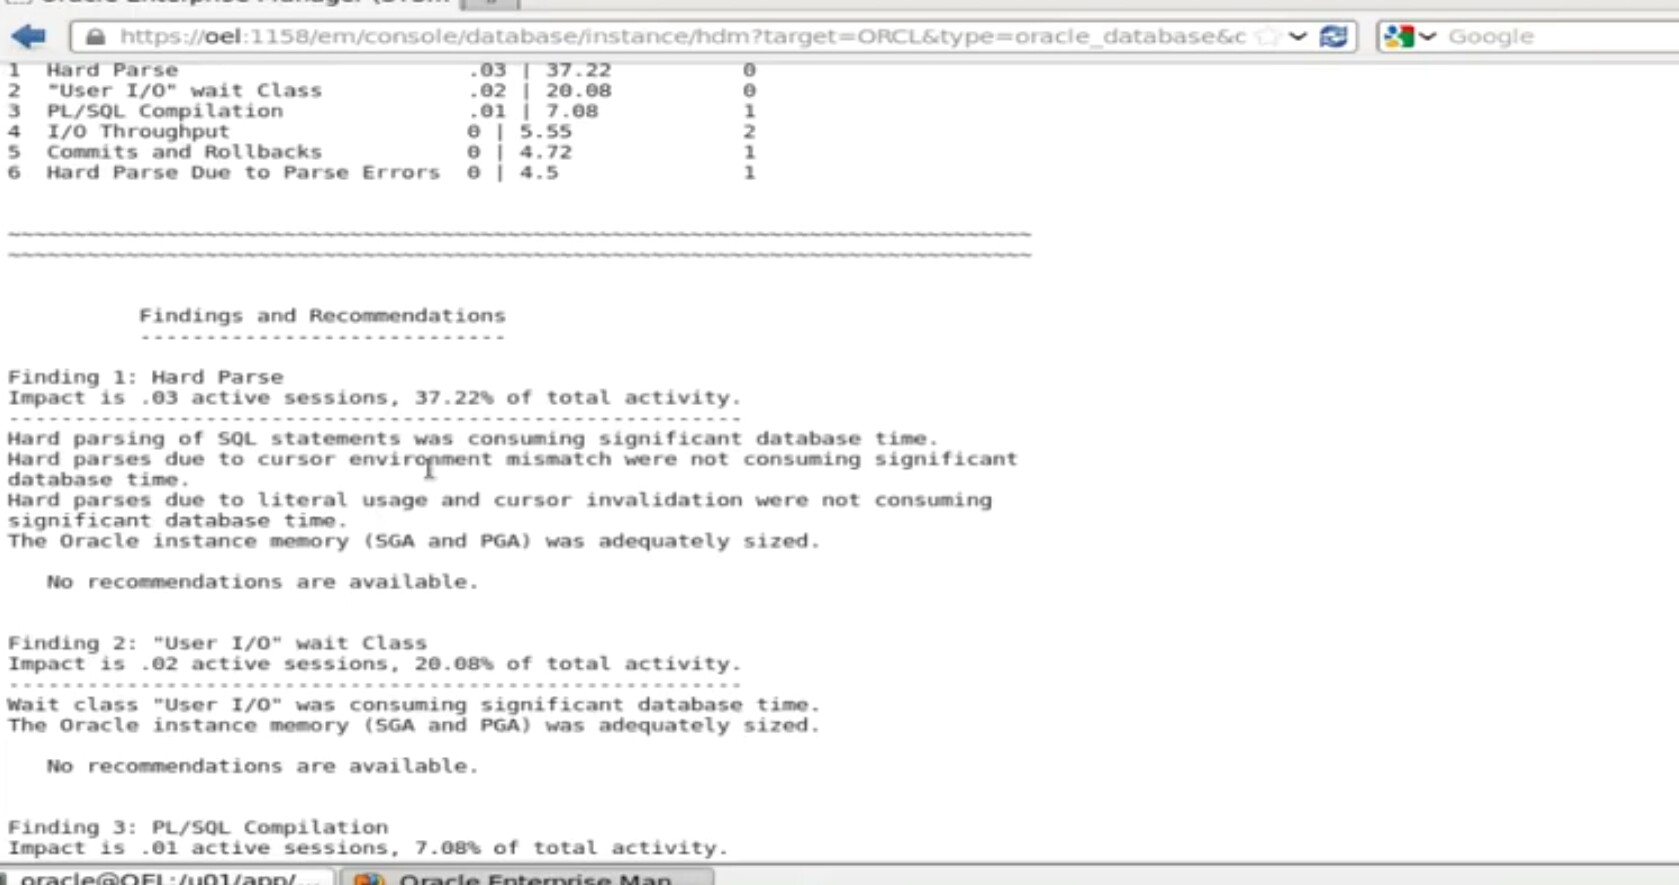
when run the script itshows the current instance like dbid  ,dbname ,instnum, instance . Instance in the workload repository schema  and host name also

we can query in sql also snapshots by using  sql query


chaitanyaoracledba


sql>select snap_id from dba_hist_snapshot;


specify the begin and end snapshot ids

chaitanyaoracledba


enter the value for begin_snap :8

begin snapshot id specified:8

             
chaitanyaoracledba

enter value for end_snap: 11

end snapshot id specified: 11

specify the report name : dccaddmrpt.html 

it will generate the report in dccaddmrpt.html format using winscp we can copy this file 


chaitanyaoracledba


chaitanyaoracledba


chaitanyaoracledba

chaitanyaoracledba

chaitanyaoracledba

chaitanyaoracledba

chaitanyaoracledba


Note : Info on ADDMRPT it may be differ from your environment like production, development and testing 


THANKS FOR VIEWING MY BLOG FOR MORE UPDATES FOLLOW ME OR SUBSCRIBE ME


AWR REPORT PERFORMANCE TUNING

 AWR REPORT PERFORMANCE TUNING
-----------------------------------------------------

Introduction
---------------

 Automatic work load Repository report or AWR report collects,processes and maintain performance statistics for problem detection and self tuning process.This gathered data is stored both in memory and in the database,and is dispalyed in both reports and views. 

 AWR was introduced in oracle 10g  and it is still being used in present versions and AWR is comes with enterprise edition

 Performance Tuning in oracle database

 The AWR is a source for information and other oracle feature it includes

 Wait events for identity performance problems

 Time model statstics

 AWR is used to collect performance statastics

 Storing dataabase statastics performance tuning

 Active session history (ASH)

AWR Snapshots performance and dash board database load instanse status and top wait events( snapshot exactly tells the what happening in database in particular time)

AWR snapshot everthing will be recorded in snapshot id like we taking any RMAN backups,blockings,deadlock) for that snapshotid we can take exact time what happening

AWR Report will be genated database should be coninuos running . 

AWR Report comes with enterprsie addition (licencesing that diagnostics and performance)

AWR reports will be stored in sysaux tables when the time of installation.

every hour snapshot will taken


let us go the process
---------------------------------------------


                               whether my database is up and running 

chaitanyaoracledba


$ ps - ef | grep pmon

let us connect with sql plus

$ sqlplus '/as sysdba'

check my database version

chaitanyaoracledba


sql>select * from v$ version;

sql >oracle database 12c enterprise edition release 12.1.0.2.0  64 bit production

 parameter statastics_level


chaitanyaoracledba


sql>show parameter control_management_pack_access;

value -->DIAGNOSTIC+TUNING


$ cd $ /ORACLE_HOME


chaitanyaoracledba


$ cd /data/oracle/app/oracle/product/12.1.0/db_home/rdbms/admin/

$ ls - ltr

$ ls - lrt | grep awrrpt *


chaitanyaoracledba


@ awrrpt.sql  lets run the sequel


chaitanyaoracledba

 it will shows the current instance---->DBID 22850381 DBNAME -->prod  instnum-->1

AWR report can be genated in the following formats like  html,txt


enter the value of report type : html

enter the value of num days    :2


chaitanyaoracledba


chaitanyaoracledba


specify the begin snapshot  and end snapshot id

enter the value of begin snapshot id :135

enter the value  for end snaphot id :137

enter the value for report _name :dcc.html

exit

$ cd /data/oracle/app/oracle/product/12.1.0/db_home/rdbms/admin/


$ ls -ltr

dcc.html


sql>$ oracle_home/dbms/admin/awrrpt.sql


chaitanyaoracledba


we cannot see htmll file here in linux platform  so that we can go winscp toool copy that file to desktop you will see the dcc.html and open the report in windows platform


chaitanyaoracledba


chaitanyaoracledba


Note :  info on AWR report performance tuning it may be differ from your environment like production,testing,development directory structures


THANKS FOR VIEWING MY BLOG FOR MORE UPDATES FOLLOW ME OR SUBSCRIBE ME

ITIL Process

ITIL Process Introduction In this Blog i am going to explain  ITIL Process, ITIL stands for Information Technology Infrastructure Library ...